Monday, December 17, 2007

Green Bottle - a new painting, a new challenge

I have been so busy that I have not had any studio time to speak of for a few weeks. I have missed my paint brushes. I finally was able to spend some time last night and today working on some new projects.
This one is an oil over acrylic underpainting on gesso board. The size is 5x7. I took the photo when I was visiting my friend. She had this bottle sitting on her window sill and the sunlight shining through it presented a challenge that I just had to accept.

Reference photo

Underpainting

Green Bottle (Oil on Board)

Friday, November 30, 2007

Here He Is---MY DADDY!!

I finished the portrait of my father. This is only my third portrait, the second in oils. I am very pleased with the results. The technique of painting a value scale underpainting and then oil overlays makes you really look at your subject and understand the structures without the complication of color. If you are very careful with your underpainting, the color overlays just fall into place. This has become my very most favorite way to paint.

Wednesday, November 28, 2007

Another Portrait

I am working on a new portrait this week. This one is a portrait of my father. I am planning for it to be his Christmas gift. This is the underpainting which is done in Burnt Sienna acrylic paint. This portrait is being painted on 8x10 gesso board.

Tuesday, November 27, 2007

Christmas Teddy Sweatshirt

With the Thanksgiving holiday, I haven't had a lot of time to paint or to do much of anything else. Here is one of my latest pieces. This little teddy bear is painted on a sweatshirt using DecoArt So-Soft fabric paints. He is adapted from a design in an old book by Trudy Beard. Sweatshirt fabric is soft and absorbent. When painting on fabric, always remember to put something under the fabric or inside an item like a garment or a bag so that the paint does not go through to the other side. You can use a piece of cardboard, several pieces of disposable palette paper, card stock. Just make sure the barrier is at least as large as the design and that it is not going to shift while you are painting. This design was painted using a deerfoot stippler and the result is a soft-edged painting that is very appropriate for a fuzzy teddy bear.

Wednesday, November 21, 2007

A White Poinsettia

At our last watercolor class for the season, we painted a red poinsettia Christmas Card. While I was giving the preliminary instructions, one of my students asked what you should do if you wanted to paint a white poinsettia. While they were working along on their red flowers, I decided to paint my sample with a white flower.

You might remember from previous discussions that white is not white. In order to give a white object form and dimension, you must use color. Also, the original design for this card had no background. It did not need one. However, a white poinsettia on white paper will disappear, so I added a background.


You can see that the colors I used on this piece were Ultramarine Blue, Violet, and Gamboge. The leaves were developed with Sap Green and tints of the other colors were added. There is no doubt that this poinsettia is white. But just look at how colorful it is!


Tuesday, November 13, 2007

Trying Something New

I have been playing around with Adirondak alcohol inks and dominoes. They are actually quite a bit of fun to use. The dominoes are first cleaned and then you dab on inks--three colors on the dauber. The effect is the look of stone. Then you stamp a design over the dried inks. Once completed, the dominoes can be turned into jewelry, magnets, or some other useful item I haven't thought of yet. You can also use the inks on glass. Here are a couple of samples of inked and stamped dominoes and a glass candle holder all done with Adirondak inks. I haven't completed the domino jewelry, yet. That is for another day.


Sunday, November 11, 2007

Basket Luncheon

Last Sunday, Town and Country Decorative Painters held their first Basket Luncheon. For those of you who are not familiar with this type of event, a basket lunch is a luncheon at which the entertainment is a gift basket auction. These kinds of luncheons are generally used as fundraisers. Ours was sponsored by the Retreat Committee and will benefit our annual retreat. We had 106 people attending and had 20 baskets. The gift baskets were donated by our members. Each one was required to have a retail value of at least $35 and had to contain at least three painted items. Our baskets all had values significantly higher than was required and they were all beautiful.
In addition to lunch and the opportunity to bid on baskets, each person took home a painted pumpkin pin and there were also painted door prizes and the table centerpieces. The luncheon was a huge success and we will be starting work on next year's luncheon very soon.

Banquet Hall

Gift Basket Display

One of the baskets I designed: "Tea With Friends"

painted items: tea box, napkins, and a framed pastel painting

Tuesday, November 6, 2007

A Portrait of my Aunt

I do not consider myself a portrait painter. This is only the second portrait I have ever painted. The first was a watercolor portrait of my mother. This painting is a 4x4 oil on board painted from a photograph of my Aunt. I have to say I am pleased with the way it turned out, generally. I am planning to send it to her for her birthday.


Wednesday, October 31, 2007

New Christmas Card Design

This week one of my watercolor classes wanted to work on a project that could be completed in one class. Most of the class projects take two classes to complete. So, I pulled out a drawing I did a couple of years ago but never used. We worked together to develop the painting on a greeting card. The most important lesson I hope they took away from the class is that they can take any line drawing and develop a painting from it. They don't need to have detailed instructions for everything they wish to paint. These students have taken classes with me for a couple of years, so they are not beginners. It is time to stretch their creative muscles.

Monday, October 22, 2007

The latest still life

Here is my latest painting. It is done on 8x10 gesso board. There is a Burnt Sienna underpainting with oil overlays.


Underpainting
You can see in this photo of the underpainting that the vase on the right looks crooked. One of the things a value study underpainting allows you to do is check for design flaws. I checked the vase and sure enough, the right side is not straight. I was able to correct the underpainting before I began the oil overlays.

Completed Painting
The vase on the right still looks a little crooked in this photo. I went back and checked it and it seems to be the photo. The vase is actually straight. This appears to be an optical illusion caused by a combination of the design on the vase and the angle of the camera to the painting when I took the picture.

Thursday, October 18, 2007

Tiny Bottles

Here is a completed miniature. I haven't really worked on a miniature for a while. This piece is a 4x4 clayboard surface. A Burnt Sienna underpainting using acrylic paint was the first step. This underpainting is a value study for the final painting. Because the acrylic paint dries quickly, developing the value study in this way allows you to quickly move on to the business of applying the oil overlays.

Oil overlays are applied using water mixable oils.

Completed Dachshund

This morning I completed the oil overlays on the Dachshund. I think he turned out pretty well. Are you interested in a 5x7 portrait of your pet? I will soon have a purchase option here on my blog. If you want it sooner, contact me at terrierpainter@yahoo.com and I will give you the information.

Wednesday, October 17, 2007

Preparing new projects

My personal studio time seems to be available only toward the end of the week for the moment. I finally got time to work on my projects this afternoon and chose to spend that time preparing underpaintings to work on tomorrow. I have two underpaintings completed today so that I can do the oil overlays tomorrow. The dachshund is on a 5x7 gesso board and the still life is on a 4x4 clayboard.

Tuesday, October 16, 2007

Theodora is finished

I have a small class of three ladies every Tuesday morning. They are learning to paint with watercolor. They used to come to my continuing ed class at the college, but those classes are not filling any more, so they come to my home. The first piece we worked on since we started these classes is a piece I call Theodora's Tea. I created this painting several years ago. It was the very first pattern packet I designed and developed myself. Even though it is a few years old, students still love to paint it and it is a charming little painting. Here is Theodora.

Friday, October 12, 2007

My new project-a painting a day (mostly)

I have been working with a new coach who has suggested doing a painting a day. These are small paintings--5x7, 6x6, 4x4. Since I like working small, this approach suits me just fine. The objective is to complete a painting from start to finish in a few hours with a goal of decreasing your time and increasing your quality. Today, my painting was done on 5x7 gesso board basecoated in orange. The value scale underpainting was done in black and then I applied oil overlays in water mixable oils. Zach lives in Alaska and his Mama sent me his picture when they were on vacation. I simplified the background because the exercise was to paint Zach himself.

Thursday, October 11, 2007

Completed Portrait

I finished Windy's portrait today. I like the results. Now I have to wait for it to dry before it can go in a special frame.

Wednesday, October 10, 2007

A Portrait of Windy

Last week I posted an underpainting of a portrait of Miss Windy, my Lakeland Terrier. I finally was able to get back to it today and start the oil overlay. It is coming along quite nicely. The support is a 5x7 gesso board that was basecoated in orange acrylic. A value study was then applies using black acrylic. Now I am applying an oil overlay using the Holbein Duo Aqua water mixable oils.

Monday, October 8, 2007

Learn To Paint Month

The month of October is designated as Learn To Paint Month. The decorative painting club is celebrating this month by holding free Learn To Paint classes at 4 different locations in our region. This coming Saturday, I will be the instructor for the session in our town. We will have two classes at the local library. They will be open to the first 15 people who sign up for each session. We will be teaching the same simple project in all of the class locations. The project is a small diary/notebook with a papier mache cover. We are painting a design that was published by Prudy Vannier for use with these types of events. We are providing all of the materials--paint, books, brushes, tracing paper, etc--for the classes and there is no fee for the class. We hope that we will inspire some of the participants to want to study further and to perhaps even join our group.


The Learn to Paint project

Saturday, October 6, 2007

What do you do with a ceramic pumpkin??


I was handed several ceramic pumpkins to turn into centerpieces with some painting on them. They are lovely pumpkins in their own right and did not require a lot of detailed painting. So, what to do? Fortunately, these pumpkins are beautifully painted from the factory and have a nice matte finish making them easy to paint on.

DecoArt has come out with a new dimensional paint with a writing tip. It comes in regular colors and metallics. The one that I bought is Dazzling Metallics Elegant Finish Acrylic Dimensional Writer in gold. The paint is quite thick and is applied using the writing tip that comes on the bottle. Using this paint, I created swirls around the top of the pumpkin. I saw a similar project in an obscure craft magazine done on a papier mache pumpkin.

I think the result is quite nice and the pumpkin will look lovely sitting in the middle of the table in a bed of silk Autumn leaves. This is the sort of project that takes only a few minutes to complete and requires little painting skill. So, if you are looking for a simple centerpiece for your thanksgiving table, give this some thought. You can find similar pumpkins at reasonable cost at your local art and craft stores.

Wednesday, October 3, 2007

Today's work

I had an entire day to spend in my studio today. I worked on two new paintings. This one is a portrait of my dog. She is a Lakeland Terrier named Windy. The painting is on 5x7 gesso board. So far, I have completed the underpainting. I am using Robert Warren's technique for the underpainting which is to basecoat the surface (canvas or board) in orange acrylic and then complete the value scale painting in black acrylic. Tomorrow I will begin work on the color.

Tuesday, October 2, 2007

Artist of the Month

I am honored to have been selected to be the Artist of the Month for the month of October by the Transit Fine Art Gallery in Oil City, PA. This gallery offers work by local artists. Each month they present a major exhibit for one artist. One wall of the gallery is given over to displaying the selected artist's work. My exhibit opened today and will run through the end of the month.


Monday, October 1, 2007

A Study Method


I have reached a new place in my painting life with regard to study. For a lot of years I have religiously taken workshops with a variety of teachers. This has involved traveling to the workshop locations, hotels, meals, the cost of the workshop, supplies, etc. I have benefited from all of these experiences, but there is a cost associated with all that learning. A couple of weeks ago an artist friend told me that I should just work through some of the books in my extensive library and use those books as my teacher. Once I have learned the techniques and approaches that one "teacher" is using, move on to another book. You can also make use of some of the videos that are out in the world (and in my library as well). She recommended starting with the Helen van Wyk books that I already own.

Interestingly enough, the Robert Glen Twice Weekly Newsletter was written on the subject of having a personal coach. His recommendation was almost exactly the same as the advice my friend gave me. Use books and videos and paint for a couple of hours every day.

I don't necessarily need to be hit over the head with a bat to recognize that when you get the same advice from multiple unrelated sources in a short period of time, the advice is probably valid. So, I am working through my Helen van Wyk books. I may not do everything in the books, but I will pick and choose the things that most appeal to me. The objective is to learn how she did what she did and be able to apply the principles to my own work. At the same time I will be working on projects that are purely my own.

Here is a painting done in water mixable oils with an underpainting in Burnt Sienna acrylic. It is a study of silver. It is based on a painting from Helen van Wyk's Welcome to my Studio. Helen did not always use an underpainting and when she did, it was a grey scale rather than Burnt Sienna. Practicing using an underpainting makes you think about value placement without having to worry about the color. Once the underpainting is done, then applying the color on top is relatively quick and easy.

Sunday, September 30, 2007

A Painted Quilt Square

Another project from my studio--a painted quilt square. This design is painted on a piece of white cotton. The theme of the quilt is the state flowers and birds of the 13 original colonies. Since I grew up in Delaware, I volunteered to do the Delaware square. Each person who participated in the quilt project was given the fabric square and the design for her quilt block from an old embroidery book that included the birds and flowers of all 50 states. In this way, the designs were consistent, even though the painting on each one may be a different style. Each one has a banner, along with a design that includes the bird and the flower for that state.

The Delaware state bird is the Blue Hen Chicken. It was originally bred for cock fighting, which, of course, is illegal today. I don't know if this breed of chicken is widely grown today. If it is, it probably ends up on the dinner table. It is not a flashy bird. Its feathers are grey with some white markings. The only real color on this bird is the red of its wattle and comb. The Blue Hen is the mascot of the University of Delaware. although the University of Delaware Fighting Blue Hen is actually blue. The state flower is the Peach Blossom.

So here is the quilt square. It is painted with DecoArt SoSoft fabric paint.

Friday, September 28, 2007

Another pastel painting

Here is another little pastel painting from my studio this week. This time of year, the sunflowers are in bloom. In our area there are fields of sunflowers--a very impressive site. this piece will be matted with a black mat before it is framed.

Thursday, September 27, 2007

Tea for Me -- design ideas

I found a charming little tea-for-one set that was covered with funky teapots. The set consists of a cup, saucer, and teapot that stack together when not in use. From this came an idea for a gift basket. The funky teapots made a perfect decoration for a tray, a cookie plate, and a framed pastel painting. What a fun basket this will be. Some teabags, cookies, a napkin and crocheted napkin ring, and a copy of the first book in the Tea Shop Mystery Series will give someone everything they need to enjoy a quiet cup of afternoon tea.


Tuesday, September 25, 2007

New Technique--to me

How time flies! I didn't realize how long it had been since I posted anything. September has been a busy month.

Last week the Town and Country Decorative Painters hosted a 3-day seminar with Connie Parkinson. She came in a couple of days early and spent some time with me playing in my studio. It was a joy to have someone to paint with. We painted from 9am until 1:30am the next day and only stopped long enough to eat our lunch and dinner.

The paintings we did used an underpainting technique. They were painted on gesso board. The design was first painted in Burnt Sienna acrylic paint using a bit of water to thin it when we needed to created lighter tones. The result was a sepia-like painting. This technique is like grisaille (pronounced gris-eye) in which an underpainting is done in shades of gray. Once the underpainting is completed, the painting is completed with oil paints. In this case, we used the water-mixable oils.

The advantage to using Burnt Sienna rather than shades of gray for the underpainting is that Burnt Sienna is a warm color and puts life into the painting. All oils are somewhat translucent so whatever color is underneath will influence the finished work.

Here is one of the pieces we painted. This bowl of grapes is painted from a photo that appeared in Gourmet magazine in 2002. I loved the photo and wrote tot he photographer, Romulo Vanes, to ask permission to use it as a reference. He called me and was most gracious about giving his permission. Please remember that all photos in magazines are copyright and you must ask permission to use them or you could find yourself in legal difficulties. Not every magazine or photographer will be flattered or cooperative about giving their permission.

Grape Compote in sepia tones


Grape Compote
finished painting

Tuesday, September 4, 2007

Ewe and Me -- another design inspiration

I am participating in a basket lunch project. A basket lunch is a luncheon where gift baskets are auctioned off. The luncheon has a theme. Our luncheon theme is Luncheon in the Pumpkin Patch. The table centerpieces and place favors for each person attending all relate to the theme. In this case, our dessert is going to be pumpkin cake to fit our theme as well. Various people create gift baskets. Each basket is themed, but not necessarily to match the luncheon theme. Each basket must contain at least three painted items and must have a retail value of at least $35.

With that as background, my friend found a wooden box with sides made of sheep cutouts. Together we decided on the theme "Ewe and Me Is Friends" (disregard the grammatical errors, they are not as important as the effect of the theme). She has painted the box. My contribution is two mugs and a scrapbook album. I have painted the sheep, she is going to do the lettering. Each item will have the saying "Ewe and Me is Friends" painted above and below the sheep. The mugs are painted with Plaid Enamel for Glass. The little 3"x3" insert in the photo album is done with colored pencil and soft pastels on blue Color Lock paper. Here are photos of the items as I handed them off.


Saturday, August 25, 2007

Design Ideas

Where do ideas for designs come from? They can come from a number of different places. Sometimes you are inspired by a place you are visiting or that you pass by each day. Sometimes your inspiration comes from a beautiful object that you own. Other times you may be inspired by a need.

Today's project was inspired by a Red Hat project. We are going to have a traveling tea party. We have a teapot and a pair of cups and saucers that will be passed around among our members. The member who has the teapot will draw the name of another member who will be her guest for a tea party. Since I have been asked to be in charge of this project, I decided that it would be nice to create a "tea party in a basket". I found a basket that would hold the teapot and the cups and saucers. I added two red napkins and decided that a matching plate for serving cookies would be a nice addition. Then a package of doilies and a laminated card with directions printed on it complete the basket. By having all the necessities in the basket, all the hostess has to do is invite her guest, set a pretty table, plan her menu, brew the tea, and have a pleasant visit with her Red Hat Sister.

The plate is a bisqueware plate. I painted it with regular acrylic paints. The design is adapted from the design on the tea set. It if finished with several coats of a good varnish. This plate is not food safe and is not washable. However, it can be used to serve cookies or other dry foods and can be wiped with a damp cloth. Placing a doily on it before putting food on it is a good idea.

Thursday, August 23, 2007

The last of the projects from HOOT

This is the last of the projects from HOOT. I was really pleased to get this class. It was taught by Barb Franzreb. Barb specializes in Early American art, although this project is not of that genre, and she has been commissioned by Colonial Williamsburg to design and paint items for the gift shops. I am hoping to bring her to our club for a seminar next fall.

Now, the project. Do you recognize it? First, it is a clock. I just haven't installed the clockworks yet. The surface is a 33.3 rpm record. This is about all these records are good for anymore. The theme for HOOT this year was Painting is All That Jazz. This design fits well with the theme. I am including an overall photo and a closeup of the instruments in the center. I can tell you that painting all the keys on the clarinet and saxophone was the very devil. The next musical instruments I paint will be larger! The piece is painted in acrylics. It was a fun piece to paint and what a great way to use old records!

Wednesday, August 22, 2007

More from HOOT

This is probably my favorite project from HOOT. This oil painting is from a class with Ginger Edwards. Ginger works in acrylics as well as oils. I have admired her work for a long time and was really pleased to be able to take a class with her. It was one of my Thursday classes. Since I did not know until we left on Sunday that we were not coming home until Friday, I had no classes selected for Thursday (a long story that it is not necessary to tell, call it a communication lapse). So, after registering on Monday morning, I went to the resale board and was able to find two wonderful classes. This was one of them.

Sunflowers
16x20
Oil on canvas

Tuesday, August 21, 2007

HOOT, continued

Not every project gets completed in class. I took two Genesis classes at HOOT. The first was with Carol-Lee Cisco. It is an 8" wooden plate with a fruit design that can be displayed year-round. It has a pear, an apple, some cherries, and two kinds of leaves with ribbon twined around the design. There is very little left to do on this project. The stems need to be painted on the fruit and the background needs to be repainted in the center of the plate. Finally, the ridge on the plate needs to have gold leafing applied and the rim needs to have something done--I'm not sure how I am going to finish that part yet. Overall, this is a nice project and I was pleased to take a class with Carol as she has announced that she will be retiring this year.


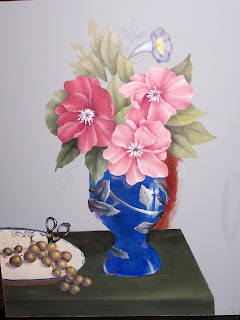
The second Genesis class was an Intensive Study class with Mary Gibilisco. It was a 12-hour class taught over two days. I was a little disappointed in the material that was covered because we did not get to the aspects of the project that I had hoped to spend most of the class time on--the fine details that make a painting come to life. There is a great deal left to do on this piece. The background needs to be painted. You can see the beginnings of the background painting to the right of the vase. There is another morning glory on the left side of the flower arrangement and a number of small filler leaves that need to be added after the background is completed. The grapes need to be improved and a lot of time could still be spent on tints, shades, shadows, highlights, etc.---the "ooo, ahs" that make the piece a finished work. This one will probably go in the closet and not be finished.

Monday, August 20, 2007

HOOT

Last week was the annual HOOT (Heart of Ohio Tole Painters) convention. It is held in the Columbus Convention Center and is a very large gathering of decorative painters. At HOOT, you have the opportunity to take a variety of different classes in different mediums. There is also a trade show where you are able to meet with some of the artists/teachers, see what various vendors have to offer, and purchase virtually everything you need and a lot of things you didn't know you needed. I took a number of different classes. The next several posts will be devoted to showcasing the class projects from the classes that I took at HOOT.

The first piece is a watercolor taught by Gayle Laible. This was a 4-hour class and the project was completed well before the class period was ended.You will note the leaves on the upper left of the design. These were done using negative painting. That is, the leaf was not painted directly. Instead, the background around the leaf was painted causing the leaf to be revealed.